
Almost every laser printer and copier has a fuser. There are two main themes:
- Lamp heating metal roller
- Ceramic heater on foil
So whilst this page looks specifically at HP fusers it applies to most.
Ease of installation splits two ways:
Big new printers and many colour printers have user changeable plug-in fusers.
Older printers and cheap new printers have fusers as an "engineer changeable consumable" - and may even try to exclude users from doing it with a reset code. Service manual and screwdriver are needed.
Nevertheless it is often easier and cheaper to change the fuser than the printer.
HP Fusers


Colour Laser Printers

Fuser Films
HP Fuser 50.X Errors
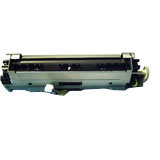
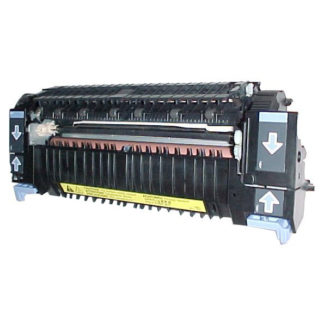
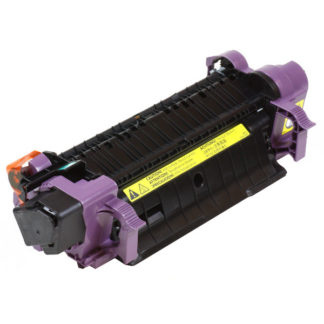
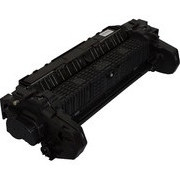
 Left side of fuser Teflon roller (sleeve) grey Pressure roller orange
This page deals with Fuser problems in HP LaserJet printers in a general sense. There are pages dealing with specific fusers: for instance a specific page on the Color LaserJet 2605 fuser here, and another on the LJ-P4014 series here. However we don't (yet) have specific pages on every fuser.
Quick Answers
If a printer requests a maintenance kit, gives 50.1 Error
or you can see damage to the fuser film or roller then you can skip this and go straight to the catalog. You need a new fuser or kit.
Every Laser printer will need a new fuser eventually - usually after something like 50,000 to 450,000 pages of print. How long a fuser lasts is determined by design, size, materials and use.
Catalog PagesGet to the point?
For advice on more complicated faults and why fusers fail, read on.
There is more here ![]() .
.
One reason we don't have explicit pages for all fusers is that there are lots of them; thousands of types. Each printer model has its own fuser, so the LaserJet M602 may look very similar to the P4015 and the fuser may actually fit - but it isn't the same thing, won't work, and (luckily) will give an error. Fusers can be mechanically identical but have quite different heating elements and arrangements of thermistors. As designers try to extract the maximum from a print-engine (a family of designs) they uprate the fuser heat output. An error message is good because if you put the wrong fuser in a machine it could damage the fuser itself, printer circuitry such as the power supply, or give bad print.
Content List
Fusers are usually the same across variants or "bundles" (the "N" "DN", "DTN" suffixes on printer names) but don't bet on it. Printers like the CLJ-2600 series have a different fuser for duplex models because they have the reversing mechanism on them.
Fuser faults can be related to obscure power problems, as we shall see.
Regional Variants
Fusers are usually different for the world's power-regions. In the US, Canada and Mexico line power is 110 Volts AC. In Japan part of the country uses 100 Volts. In most of the rest of the world mains power is nominally 220-240 Volts AC. This generally isn't a worry because fusers for the wrong voltage aren't readily available outside the region they were intended for - however web-sites will try to deliver what you order!
Buying a Fuser
Laser printers almost always last a long time but do have a design life.
Fusers fail beyond 50,000 pages (little printers) and 450,000 pages (big printers). Fusers fail when the printer has done a lot of work - 20-30 cartridges.
Fusers are not cheap; generally a bit less than a third the price of a new printer, sometimes more than half the price. Brands set the price high partly :
- because they can (there aren't many alternatives), we'll come back to that
- to encourage people to buy a new printer (preferably a cheaper one).
… Printer brands like fuser failures. They get rid of old printers.
- Failure points are predictable from a manufacturer point of view. Products often have built in obsolescence, printer brands often do too.
- Printers are fed with a steady stream of cartridges which is where the brands make money. So when you get that
50.X
error you use lots of cartridges.
Reaction to fuser failure runs like this. "Its going to be WHAT for a fuser? We could have a new printer for that".
… and people forget that:
- Cheap printers cost £50 but cost 2.3p per mono page to run
- Low end office printers cost £200 but cost 2p per mono page to run
- Office printers cost £600 and cost 1p per mono page to run
- Big printers cost £1500 and cost 0.3p per mono page to run
If your fuser failed you have probably printed more than 50,000 pages.
Cartridges cost far more than a fuser will - see below.
Error Codes
HP use a fairly consistent set of error numbers across their laser printer range. An attempt at a full list is here. If your printer consistently gives 13.x Error
that is a paper jam. Paper jams can happen in the fuser in which case if you look in the printer error log it might show a mix of error 13 and error 50.9 perhaps; suggesting the fuser is a bit too hot, so sticky toner is deflecting the sheet (turn the temperature down). Error 49.x is firmware; if it happens once turn the printer off and on again. If it happens lots of times update the printer firmware.
HP Printers report the following fuser errors:
- 50.1 Low temperature.
- 50.2 Warm up failure (timed out).
- 50.3 High temperature.
- 50.4 Faulty fuser (or Bad AC line voltage).
- 50.5 Inconsistent fuser or Wrong type fuser installed.
- 50.6 Open fuser. Fuser heater cutoff.
- 50.7 Fuser pressure release mechanism failure.
- 50.8 Low fuser temperature (sub-thermistor).
- 50.9 High fuser temperature (sub-thermistor).
Error Code Sensing & Display
Fusers are different for each printer so perhaps this generic page won't answer all your questions. You need the service manual for your specific printer. Unfortunately printer manufacturers don't always just give the manuals away. Lexmark recently seem to, as do Brother USA. Older HP manuals are generally quite easily found. Readily available service manuals are a reason to like a brand.
Printer service manuals can be really substantial documents: sizes range from 100 to 1,000 pages with a mode somewhere round 300. Despite this effort, manuals don't always give much idea why a printer might raise an error.
Error codes and messages are generated by firmware and triggered by the timing of sensors . Historically different printer models used all sorts of different processors and had various limits on what the firmware and drivers could do. There are usually two processors, one belongs to the "engine" and another (probably the one reporting the error) is part of the formatter.
HP clearly have tried to maintain some consistency in their use of error codes. Complete consistency across the error list may not have been possible in the past. As manufacturers like HP have moved to develop software on more uniform platforms and as the limitations of processor power and memory space have been left behind it ought now to be possible. Other pressures may get in the way. Control panel messages may be less important than SNMP and web interface reports. Users want "natural language" error reports even if they can be imprecise.
We certainly can't promise this document is definitive - it is based on a bit of experience, considerable reading of service manuals and a lot of web research. We hope it is helpful.
In a perfect world the precise meaning and tests to prove what has gone wrong would be given in the service manual for the specific printer. The service manuals vary in quality and some are quite vague. There may also be inconsistencies and overlaps in meaning. However the manufacturers service manual has to be the primary reference - if they don't know, we are all in doubt.
Printers with an LCD display will display the error there.
Printers without a display may use a light pattern or sequence but interpreting it will mean looking at the user manual. With a full install of the manufacturers software the error may also be shown by the Windows printer driver. (Yes, a full install of printer manufacturer software can waste disk space, but sometimes there are utilities which give detailed error messages)
Another source of information is the embedded web server on network models. Type the printers IP address (discoverable from the config page) into a browser to look at the status. In many cases the information displayed by the web-page was probably generated by SNMP and is available to network software that way as well.
Printers also have a status log which can be printed. It is usually in the test menu. If the fuser has gone you can't print it but there is usually an option to display the last few items.
There is more on how to identify and fix fuser problems here.

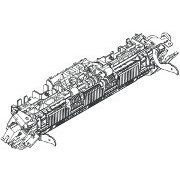
Mono laser Printer Mechanism in cross section.
The Laser Print Process
This brief outline of laser printer workings should help people who aren't familiar with the machine innards understand what the fuser does. Technicians can obviously skip this bit.
Toner is strongly coloured fine plastic powder used as the "ink" for laser printers. Toner is attracted or repelled by fields of static electricity.
Laser printers might more properly be called electrostatic or electrophotographic
printers. At the heart of things is a photoconductive drum covered in Organic Photo Conductor (OPC) material that can hold a static electric charge in the dark but loses it in the light. Give the drum a charge in the dark then expose it to a scanned laser beam and the drum carries a latent image as an electric charge.
The developer brings a thin layer of toner next to the charged area of the drum. Developers are almost always a couple of rollers one pushing powder onto the other then the developer roller passes under a doctor blade which leaves a layer about one particle thick on its surface. The developer then rotates beside the drum to pick up the image.

Colour Mechanism
The transfer roller is charged to pull the image off the drum onto a sheet of paper passing between it and the drum. The image is now made in toner powder and if you stop and open the printer as the process is running part of the image can be seen on the paper and a little on the drum. Stopping the printer at this point is commonly used as an engineer test as we shall see.
The laser-print process is pretty reliable since it is built from continuously acting rollers. Toner will inevitably run out. Eventually the rollers wear out, usually the relatively soft OPC drum, then developer and charge rollers. Early laser printers needed frequent attention from technicians. One of the key decisions making them acceptable as office machines was to put toner, developer and drum into a cartridge. Laser printers had been rather specialist machines for computer centres, but the cartridge allows ordinary office workers without detailed technical knowledge to own one. When something goes wrong, the user changes the cartridge.
Simple maintenance becomes even more important with colour printers because they generally have four of the mechanisms just outlined, usually stacked one after the other. Cartridges reduce the burden of fault-finding.
Two main things go wrong with fusers:
- The roller or film that heats the toner degenerates. This may not be detectable by the printer itself, so the user will see a defective print with blotches on it. Bits of fuser film-sleeve may emerge into the output tray and eventually there will be a paper jam because paper won't be able to pass through.
- The heater may break down. This should give an error like (50.1) because circuitry that can detect the problem is just about compulsory (it's part of the feedback loop to control temperature).
Some of the more complicated errors need information about how fusers work.
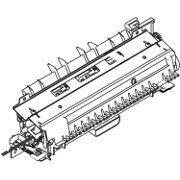
Basic idea of a fuser. Heated roller and pressure roller.
About Fusers
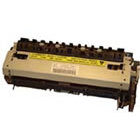
The fuser makes toner powder adhere to a print medium such as paper using a combination of heat and pressure. Heat softens the toner and pressure ensures adhesion to the surface. On older printers there is usually an upper heated metal roller to provide the heat and a lower rubber roller on springs providing the pressure.
Most recent HP and Canon printers have replaced the top metal roller with a film of non-stick material like teflon. The main advantage is a significant cut in power consumption.
The fuser needs a fairly powerful heater. A 60 ppm printer is raising 300 grams of paper to 150 centigrade in one minute. Power for the fuser heater usually comes directly from mains (line) voltage. Power to the fuser is controlled via a triac or some other semiconductor relay device which turns it on and off to reach the correct temperature.

Fuser and power supply.
More schematics below.
The power needed by the fuser can mean the support circuitry is a bit complicated. Power comes into the printer on a board called the low voltage power supply (LVPS) so the fuser power is usually switched from there.
A processor called the DC controller (or engine controller) provides motor and power control for things like the fuser. The actual fuser control relay may be on the LVPS but its signal comes from the DC Controller. (On some recent printers the DC controller might be integrated with another board so puzzling out the interconnections takes time).
The DC controller also reads sensors - the thermistor on the fuser and the various paper movement opto-sensors.
The DC controller acts as a feedback loop to control fuser temperature, turning the triac on to make it hotter then sensing the temperature rise via the thermistor and turning the power back off when the required temperature is reached. The temperature may be varied - hotter for heavy media, cooler but slower for media like transparencies.
Just in case the DC controller, triac or some other component goes wrong the fuser also has a thermal switch or fuse and this will pop if the fuser gets too hot. Some will reset when they cool down (others won't, but it's not a common problem).
When the printer reports a fuser error this is genuinely most likely to be the fuser itself. However the fault could lie in the sensors, connectors, DC controller or the low voltage power supply board. Actual fuser faults can often be spotted by visually examining the object and perhaps measuring its resistance with a multimeter.
HP generally recommend a really simple fix; turn the printer off, wait 30 seconds (or perhaps 20 minutes) then turn it back on. That might sometimes work and since it is simple it is worth trying.
Service
Life used to be simple; when a printer went wrong an engineer came to fix it. Laser printers cost £2000+ and engineering contract cover (usually at about 10%) used to cost £200 per year.
Businesses like contract cover because accountants want known figures for the business plan. When you buy a new printer there is an opportunity to buy a Care Pack
or suchlike from the manufacturer. However care packs may not seem great value, especially when you consider that printers often have more than 1 year warranty anyway. Care packs still cost about £200 for 3 year next business day cover (some cover fusers).
Contract cover is less widespread now. Economic factors are against it. Business quality laser printers now have costs in the £500 range. £200 per year will pay for call-outs, parts and the odd difficult job but £50 will not without some compromises. Hardware cover is often bundled as part of a software contract.
Some points have improved.
Fusers could be an issue in the old days; they were "engineer changeable consumables" (not part of contract). Fusers wear out quite predictably and should count as "consumable". Although a fuser might cost £200 itself that is often for a unit that will run for 220,000 pages - less than 0.1p per page.
On many recent mono and colour printers the fuser IS a customer replaceable unit, it plugs in. This is true for the HP LaserJet 4200, 4250, 4300 series, the P4014, P4015, M601, M602, Most colour printers bigger than the CLJ-3600, the Lexmark MS710, MS810 series and Samsung SCX-6545 and SCX-6555 to name a few.
Smaller printers don't have plug-in fusers; they can be quite difficult to change. It is a notable omission from the design. Manufacturers seem to prefer that old printers get thrown away.
Visible Failures
The printer electronics tries to spot problems with the fuser. It has a small collection of tools to do this. The thermistor will report temperature errors - sometimes there are two or more of them (see sub-thermistors below). There are one or two paper sensors so the electronics can check the timing of page edges. Printers can also measure the fuser power consumption - and most will report when it has gone open-circuit. The printer also stores its page-count and some idea of page cover - which also has an impact on fuser life. The electronics can't see the print quality but the user can.
Some of the most common faults may not be spotted by the printer electronics at all because of a mechanical failure of a roller or its equivalent film sleeve. The user spots the problem on the printout. The initial problem is often grey marks down the side of the page that gradually worsen.
Edge Wear
Edge Wear
Marks down the side of a page are called "edge wear". The cause is the difference in pressure between the point on the roller where there is no paper and where the paper makes a gap 0.1mm thick. This distortion gradually breaks up the Teflon on the roller or the film and it begins to de-laminate from the underlying metal. At some point the edge of the material will fail altogether and the marks will become continual and obtrusive. The printer usually has no way to know this is happening because the film next to the thermistor is intact. However it will be keeping a count of the number of pages printed and making an estimate of when the problem is likely to set in. Mono printers prompt the user for a "maintenance kit", colour printers prompt for a replacement fuser.
If a printer is mainly used with standard paper then edge-wear will be quite predictable.
Fuser Types
Fusers have been heavily researched and the subject of huge number of patents over the years (we think something like 450,000 but who's counting). There are dozens of designs but only three or four have much commercial use:
- Direct radiation heating was used in early copiers. The paper passes under heating elements. This method can run away and set fire to the paper. Early Xerox 914 copiers had a "scorch eliminator" (fire extinguisher"). Other toner fixing options were spraying the page with solvent to melt the toner, or with lacquer to stick it in place.
- Hot Roll fusers use a halogen lamp to heat a roller with a non-stick surface whilst a silicone rubber pressure roller creates a nip point for the paper as outlined above. A good thing is that the thermal capacity of the roller gives even heating of the media (paper) passing through. A bad thing is that the printer either has to raise the rollers to temperature before operating, taking several minutes or the rollers must be maintained near operating temperature wasting electricity. Power wasted can be significant - 90% of printer consumption.
- Thin roller walls and powerful heaters reduce the problem.
- Film Sleeve or Belt fusers use halogen or ceramic heaters with a thin polyimide sleeve or belt. This amounts to the ultimate thin-walled tube, there is little or no metal, the sleeve of non-stick material acts as a roller. The ceramic heater with sleeve is a pretty good answer but Canon and HP had patents protecting the idea (they are expiring). Furthermore the need to generate a lot of heat instantly meant early sleeve fusers could only be used on slow machines like the LaserJet 4L (first use). Print quality was also lower because of the lower pressures and the possibility of intermittent belt-stall. More patents are in the pipeline.
- Induction heaters use radio-frequencies to generate localised heating in a thin walled tube, sleeve or even in the toner itself. Induction heating is very popular as part of industrial production line (and a microwave oven is an induction heater) but the technology hasn't (yet) scaled down for widespread use in office-quality laser printers. The HP CLJ-5500 series are an exception.
Lots of variations are based on these types. Older hot-roll fusers use silicone oil as a separator for instance, newer designs substitute a wax incorporated in the toner, together with improved flouropolymer coatings. Every engine manufacturer has their favourite techniques and every model of printer has some variations on old themes and trials of new techniques.
The best method would probably be a non-contact induction or dielectric heater acting on the toner - but so far as we know that is for the future.
Blotches
More erratically marks can appear in the middle of the page, an irregular vertical stripe. If this happens early in the printer life it is perhaps because an object like a label has stuck - it might dislodge but the adhesive might stick to the fuser roller. Sometimes this kind of problem can be solved with a cotton bud and alcohol. Never attempt to remove a label from a fuser roller with a sharp object; it will scratch the roller and the mark will be incurable.
Marks at intervals down the page usually happen at a regular interval which corresponds with the circumference of one of the rollers in the printer. The service manual often gives a list, often under a title such as Repetitive Defects Ruler
.
Offsetting
Offsetting is a faint repetition of the material just printed down the page. Again it can be measured and pinned down to the fuser using a Stop Test
or Defects Ruler
. What is happening is that some toner from the last turn of the fuser hot surface is adhering and transferring on the second and subsequent turns. A good test is to print one bold line and see if that repeats.
In some ways this is good news because the fuser probably hasn't failed (yet). Offsetting will happen if you simply have the fuser temperature set too high - for instance set to heavy media when the paper is actually ordinary office material. The villain is probably a setting in the Windows printer driver. Unfortunately print-driver designers can't just have a straight-forward temperature setting, they like to describe it as media type. If there is difficulty finding out if it is the print driver, try printing a test page from the printer without a computer connection (before it is turned on).
Unfortunately offsetting will happen when a fuser is on its way out. As the fuser ages its non-stick abilities decline; background toner scatter increases and eventually becomes evident as offsetting. Look at the printer page count on the test page; is the fuser approaching its end of life?
Stop Test
A good quick way to discover if the problem is the fuser is to perform a stop test - sometimes called a half-way test. Set a test page away - the configuration page for instance and wait until it is just entering the fuser and then open the lid. Is the defect visible on the loser toner that hasn't yet been fused. More detailshere.
Printer electronics don't incorporate a camera looking at the output (although they might in future). The printer has no way to know these marks are occurring. Some recent fusers do carry a charge on the fuser roller or sleeve and the printer electronics might sense a change in that.
CRUs, FRUs and Hopeless Cases
Fusers in larger printers are usually Customer Replaceable Units (CRUs) - they are rather like cartridges and just plug in.
The fuser in some mid-size printers is Field Replaceable (FRU); a technician should be able to do the job quite quickly. Normally it's a matter of taking the output door or assembly off, possible a cover and then unplugging the power and sensor leads before unscrewing the fuser.
Little desktop printers sometimes seem designed to be cussed; the printer manufacturer might say "designed to a price".
More on how to identify and fix fuser problems below.
Explicit Errors - The 50.X Codes
In most cases the "50 errors" indicate that printer firmware has found a temperature problem with the fuser. A board called the DC Controller tells the power supply to turn the fuser heater on and off. The fuser has one or two thermistors to measure the heat on the rollers (and in some cases the exit temperature of the media). The printer firmware gives an error if the temperature is wrong given what the DC controller told the LV-PSU triac to do and what is being returned by the thermistor.
CAUTION!
Most fusers can be replaced or repaired, even if they are not simply plug-in units. This job does require technical skills and care. Like all mains-powered equipment laser printers are potentially dangerous. There are extra hazards from the laser, heat and power circuits for the fuser and from the high voltage connections in the machine.
Technicians are used to PCs where high voltages are confined in the power supply unit. In a laser printer the fuser is directly powered by the mains and live terminals may be exposed. Since the machine works using high voltages every wire is potentially dangerous. Lid switches turn off the exposed points around the cartridges - nothing else is certain. Unplug the printer before working on it. Get the Service Manual if possible; it will have a safety guide.
Fuser innards will be hot for some time after the printer is turned off - the outer case moderately so, inner parts scorching.
The laser used in printers is more powerful than blackboard-pointer types. A few lasers point up or outwards, so working with lid-switches foxed carries risks. The infra-red lasers typically used have an invisible beam but it could permanently damage the retina of human eyes.
Manufacturers usually cover themselves from lawsuits by saying on the covers no user serviceable parts inside
. That might be true but there are over a million people employed in IT in the UK including 271,000 ICT managers and 276,000 IT operations technicians - so maybe they wouldn't think of themselves as "users". There are hints on the difficulties below.
It would be difficult to regulate the computer industry without stopping progress. A pragmatic approach is needed; know thyself. If you can't understand the wiring at the back of a TV, can't put a plug on, or install MS-Windows drivers successfully get a technician to deal with fuser problems. Talents differ.
50.1 Fuser Low Temperature
This is often straight evidence that the fuser heater has failed. Some HP material says "a low fuser temperature error has occurred in the main thermistor" meaning the thermistor shows no temperature change. Experience suggests the thermistor itself is unlikely to fail whilst the heater will do so. It is also worth noting that the fuser circuit generally has an independent fuse that could fail. If the "fuser fuse" goes the printer will power up but the fuser won't.
All fuser heater elements are brittle and may break. Halogen heaters will ultimately fail just as lightbulbs do. Ceramic heaters are right next to the belt and lubrication failures could cause wear and failure. Given the violent heating of the ceramic element the materials have had to be carefully chosen to survive.
Very old HP and Canon devices (pre 1998) use the hot-roll technique, a halogen lamp in an aluminium roller coated in teflon. Other manufacturers still quite often use this design. A common fault at shipment is that the lamp falls out of its holder. It's usually unbroken and can be replaced quite easily but of course it would be better if this never happened. Manufacturers and refurbishers spend a lot of time and effort designing foam end-pieces to try to prevent a jolt dislodging parts.
HP and Canon use instant-on fusers in all recent printers. In most cases the heater is a ceramic strip with a PAI/teflon sleeve moving freely around it. A high temperature lubricant eases the movement of the belt over the static heater. The heater is mounted in a rigid steel bar and is less vulnerable to being damaged by a jolt; it could be cracked if the fuser is dropped.
The ceramic heat element is an alumina or suchlike ceramic base about 1mm thick. An electrical trace is made on this with silver palladium, ruthenium oxide or similar robust resistive materials to a thickness of about 10 micrometers. On top of this is a glass coat again about 10 micrometers thick.
Some ceramic heaters have a single trace. Many will have two traces and a common wire, the two traces give the fuser control circuit a crude and a fine adjustment.


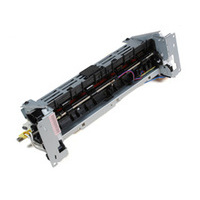
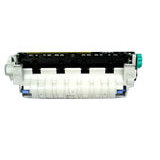
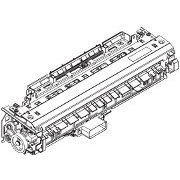
With an unfamiliar fuser you may need to remove a cover to figure out which wires carry power and which thermistor signals. Then check for a "rational" value. 74.8 Ohms seems reasonable for a medium-speed laser-printer with a ceramic heater like the LJ-4200 RM1-0014 fuser pictured here. More below.
If the heater is broken it will show as open circuit with a multimeter. Testing this means identifying the power wires and metering across the connector - which is obviously model dependent. There are usually two or more traces on recent fast printers.
- Halogen heater lamps typically have a resistance of the order 7-10 Ohms cold - perhaps in the range 5-10 ohms with the US lower voltage. Resistance rises substantially to perhaps 50 -100 Ohms when the lamp is hot.
- Ceramic tracks are likely to have a resistance around 60 Ohms cold for UK voltage (it will rise a bit when hot, but not so much) and perhaps half that in the US. Ceramic heaters often have two or more traces; there might be one at 60 ohms and another at 180 ohms.
Fuser resistance depends on model. There is likely to be some consistency because the device needs to deliver something between 200 watts average for a slow little printer and perhaps a kilowatt or more for a big fast printer. With a resistance of 48 Ohms a device consumes 4.6 amps and delivers a kilowatt at 220 volts.
Service manuals often seem wayward about fuser resistance. If they give any measurement at all they suggest anything from 10 to 200 ohms. Very high resistances might be possible if one heater bar has multiple track elements. The printer electronics can vary both the waveform and the duty cycle so the fuser resistance could be surprisingly low.
What shouldn't happen is an open circuit on what is clearly a power wire - that is a failed heater.
If you don't have a multimeter or don't know what to measure then with a "50.1" error it is usually safe to presume the printer is right about this error and just get a new fuser.
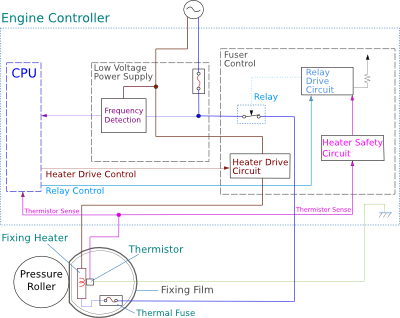
This schematic of fuser operation is derived from one of HP / Canon's simpler printers. The upper part shows the general principles of the controller board and the lower part a cross-section through the fuser.
Power passes through the fuse and the relay, then through the thermal fuse and into the heater. Power return is through the heater drive control circuit.
If the printer is not powered up then the relay cannot operate and the fuser is left without power. Likewise if the lid switch is opened the relay drive circuit is broken. The relay drive circuit also has an input from the heater safety circuit.
In normal operation the thermistor signal feeds to the CPU, is digitised and software controls the heater drive circuit. The heater drive triac should sensibly switch at the zero crossing point of the mains current - and that may be one of the uses of frequency detection.
50.2 Warm Up Failure (timed out).
This is also called "Slow Fuser", "timed out" and "a fuser warm-up service error has occurred". The temperature of the fuser rose but not sufficiently in the time allowed by the printer firmware. The fault might occur within a few seconds of power on, or after a page has printed. Conceivably it may only happen with certain kinds of media, or when paper comes from cassette tray 2.
This error is less certain to be cleared by a new fuser so other issues might be worth examining.
If the printer has a ceramic heater with multiple traces this fault is likely to be one trace failing and the fuser temperature not rising fast enough. In that case replacing the fuser is the normal option. Service manuals are erratic about giving information that would help, like track resistances (most don't).
It is possible for this fault to be power supply or electronic and not the fuser.
It is possible to get this kind of fault during a power brown-out. That isn't usual in the US or Europe, but is frequent in some countries. It is also possible to cause a local low voltage by overloading circuits. Heat falls away rapidly with a low voltage (obeying a square law).
Plug the printer directly into a wall socket. Extension cables and surge protectors can create a voltage drop that allows the printer electronics to work but causes problems when the powerful fuser heater cuts in. Don't plug printers into a UPS or inverter - most of them can't drive the heater and the voltage will fall so that the fuser can't reach temperature. (The UPS should beep and complain about overload as well).
Check the print-driver settings. Using heat absorbing card whilst the printer is set for normal paper could trigger this error whilst printing. Printer settings often disguise the actual temperature setting as a "media type".
Some printers work more slowly from the MP tray (tray 1) than from tray 2. If the printer will work from the MP tray but gives this error from tray 2 that suggests there is difficulty getting to the temperature needed for high speed operation.

Schematic circuit for LaserJet 4200 and successors. This time there are two heaters and an environment thermistor to estimate ambient air conditions.
50.2 errors are essentially a judgement made by the printer firmware. Some service manuals say the printer measures the ambient temperature using the environment thermistor, firmware estimates how long it will take the fuser to rise to temperature and then times out if it takes significantly longer. Blocking the airflow for the environment thermistor could therefore trigger this kind of fault - the printer thinks its environment is warm and allows a short rise time. The fault is apparently common on the CP3505 when printing envelopes and can be cleared by updating the firmware.
One issue with some HP fusers is damage to the ceramic heater connectors caused by the connector not being adequately pushed home. Arcing takes place between the connector and the silvered surface of the heater so the resistive strip doesn't come to temperature.
A fault in the low voltage power supply (LV-PSU) could also cause this - a triac or one relay pole might partly fail allowing the fuser temperature to rise a bit but not adequately.
Really weird faults like an envelope getting wrapped around the fuser roller could also cause this sort of fault. The fuser roller does reach temperature but the thermistor fails to do so in the time allowed.
50.2 faults need some technical judgement. Ideally they need the multimeter test suggested above. Try swapping the fuser into another printer if possible. Simply re-seating connectors may work, tarnish on a thermistor connector is a possible cause. The chances are that the fuser is at fault, but other possibilities need consideration.
Different industries have different traditions
In the plastics industry when a machine malfunctions the first guess is usually to change the thermocouple - that generally clears the fault.
50.2, 50.3, 50.8 and 50.9 errors all relate to thermistors - equivalent to a thermocouple. However in the laser printer world it is rare for the thermistor to be faulty - but not impossible.
Most thermistors have a resistance around 100 - 200 kilo-ohms at room temperature rising rapidly with temperature increase (most are NTC - negative temperature coefficient) . The usual measurement mechanism is to strap one arm of the thermistor to ground and pull the other to 3 or 5 volts through a resistor. The engine-control board periodically connects the thermistor to an analogue to digital converter and that gives the temperature.
Checking thermistor operation with a multimeter is easy - put it in the ohm range and see if the value changes when you touch the thermistor with a finger - or hold it over a cup of tea.
50.3 High Temperature
HP say "A high fuser temperature error has occurred in the main thermistor". This could be the converse of 50.2 Warm Up Failure - the fuser got too hot, or perhaps more quickly than firmware expected.
The most likely cause of this sort of problem if the printer has been in use seems to be ventilation failure - fans blocked, or air filters on printers that have them (the CLJ-9500 for instance). A lot of hard use might potentially cause the fuser to overheat.
It is worth checking the computer settings when this fault happens. If you set the media type to thick card and print office paper then the fuser is likely to overheat.
If the fuser is too hot, some kinds of print defects become more likely:
- Offsetting or ghosting. An image of what was printed on the first line of the page reappears faintly three or four times down it - this is usually most evident with headings or dense graphics. (see above).
- Creased paper becomes likely. Paper is hygroscopic and contains some water; the hot fuser turns that to steam and the paper expands then contracts erratically making peculiar flat folds.
- Paper jams become more likely. The paper doesn't de-tack from the fuser hot surface and either hits the exit assembly at a peculiar angle or in bad cases gets wrapped round with the fuser roller or film. This fault is particularly likely with heavily printed pages - posters and artwork. Ghosting and jams in the fuser are usually a sign of ageing and setting the temperature high will exacerbate the problem.

A laser-printer fan showing the typical effects of factory work - heavy dust build-up (it's meant to be black, not brown). It does work, but isn't as effective as it should be.
When a fan is in this state other electronics are often very dirty as well. All sorts of mysterious behaviour can be cured by cleaning the machine up. Unfortunately that isn't always easy - in many printers the engine controller is deeply buried in the heart of the mechanical assembly. Sometimes partially stripping the machines and a blast with a compressor is the only way to get dirt out. DON'T blast fan blades with a compressor - it is fun but overvoltages them and they stop working (as harsh experience has taught).
Fans have rotation sensors and a fan stalling or running slowly should report an error (in the 57
range). There could be a stage where the fuser can overheat but fan behaviour is within parameters.
A defect in the fuser itself is unlikely to give this fault (thermistors might).
A possibility might be that the DC controller failed to shut down the fuser heater as the temperature rose. Another possible cause is the low voltage power supply which usually contains the control relay(s) or triac. If the fault goes to 50.6 then most likely either the DC controller or the triac on the low voltage power supply have failed causing an open fuser when the thermostat cutoff operates.
Another possibility in the UK is high mains voltage. Mains voltage in the north of the UK is quite frequently well over 240 volts. (see the article here ). Since the line voltage is nominally supposed to be 220 volts the substantial over-voltage might upset the printer timings. It ought not to be a problem as the feedback loop through the thermistor should keep the temperature fairly even regardless - but only the firmware authors could know whether that is true. Printer brands are naturally neurotic about the merest possibility of the printer bursting into flames. We might expect the "50.4 Error" Bad Fuser or Bad Line Voltage - but reporting that fault would depend on having hardware to detect it - and some printers won't do that.
Curiously, using a UPS in a laser printer circuit could cause this fault as well. The load of the fuser will create a bad power factor and the fuser control circuit may behave oddly.
Buying a new fuser is not particularly likely to fix the 50.3 fault. If possible swap the fuser into another machine and if that works swap the DC controller then the low voltage power supply to confirm the fault before buying new parts. Merely re-seating the connectors is moderately likely to clear this sort of fault.
Experience suggests high temperature is not a common fault. If there is no other printer available for swapping parts use a multimeter to check that the fuser heater has a "reasonable" resistance. If you can find the triac on the LV-PSU it might have failed close-circuit and can be replaced if you have soldering skills and can source the part. If the triac has failed components adjacent to it are suspect as well.
If you are swapping things: suspected bad part into known good printer - NOT good part into suspect printer. A bad printer power supply can damage parts. Bad parts are less likely to damage a good machine.
50.4 Faulty Fuser (or Bad AC line voltage)
Sometimes this is also said to be "fuser heater wire failure" or "fuser drive or power unit error". There may be some inconsistency either in what it means or how it is interpreted between printers.
Detecting voltage and/or current flow in a circuit is not difficult. For mains power voltage it needs a divider network and an A to D converter and for current it needs something like a pulse transformer. Not every printer power supply is likely to be able to monitor the fuser current, and examining a few suggests they can't. On low end printers it wouldn't be worth the expense and on more expensive models it might, so perhaps that explains any inconsistency in use of this message. If no current flows in the fuser it won't get hot so in about 20 seconds time the printer will give a 50.1 error anyway.
Check that the fuser is for the right voltage (110V in the US 220V in Europe, Ireland and the UK). This error might suggest that the line voltage is wrong - although that should be a 50.5 error.
In the US where the supply line is at 110 volts long extension cables or thin IEC cables could cause this fault. That problem is less likely in the UK or EU where 220 Volt mains is used and currents are halved - but it's still a possibility. Note that not all IEC cables are the same.
A possible cause is that the equipment is being driven by a generator with voltage or frequency out of tolerance. The fuser's triac control circuit will not operate correctly if the power supply frequency is outside the range 40 to 70 Hz.
Attempting to plug a laser printer into a UPS will not normally work. The fuser will draw a very high current intermittently and this is likely to drag the UPS voltage and frequency out of spec.
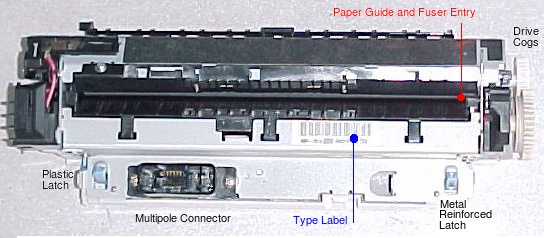
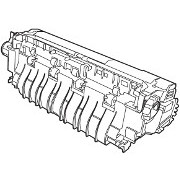
A fairly typical fuser (LaserJet 4200) showing the product label (curiously, they have put the label facing inside the printer where it can't be seen - and kept that up through several design changes into the M602 series).
Be careful when ordering fusers; it is not like ordering a pullover. Suppliers are unlikely to take them back if you order the wrong thing and then open the box. They will at least want a re-stocking fee. By the time you have the 50.5 Error
it is too late of course.
If there is any doubt about which fuser you need email and ask. It will be far easier than trying to swap for the right fuser.
50.5 Inconsistent Fuser or Wrong Type of Fuser Installed.
This message is particularly common with the LaserJet 4200 / 4300 series where six printer models can take 3 or 4 fusers that are physically very similar. HP designed the fuser so that the connections distinguish between fusers for the 4200 and 4300. HP didn't make the scheme extendible however so the 4200 printer can't directly detect the RM1-1082 intended for the 4240/4250/4350. Liberty Parts have an interesting article on this.
Printers also measure the thermistor(s) presence and resistance and most printers also have an exit sensor so the printers can see wiring differences between these.
Some printers say "Fuser voltage mismatch. Verify voltage model." for this message. The printer thinks a 110 volt fuser has been installed in a 220 volt model or vice versa. It may be measuring the temperature rise or in recent printers it may be measuring the current.
A 50.5 message is pretty conclusive. Either it's the wrong fuser or the connectors aren't mating correctly.
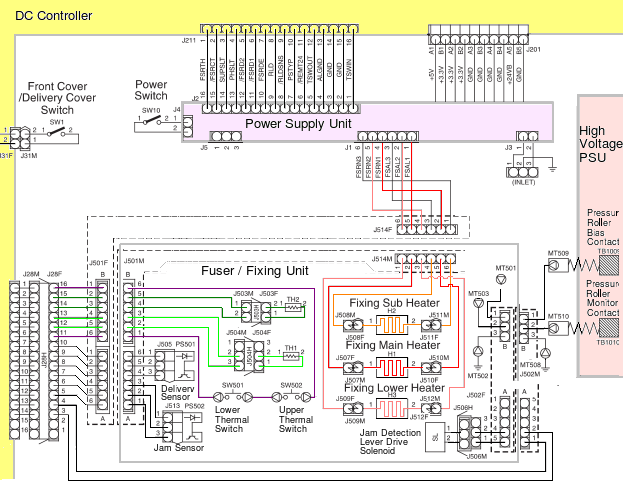
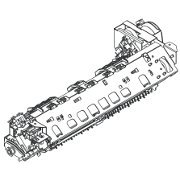
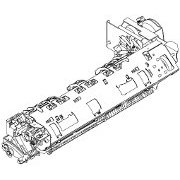
Fusers and support electronics have different capabilities in what errors they could report. This diagram shows the HP LaserJet 9000/ 9040 /9050 fuser in context with the sensors feeding into the DC controller (yellow) and three heaters fed from the power supply. There are two heaters in the top roller and one in the bottom roller in this case - the fuser is quite large because these machines are heavily used and A3 capable.
HP provide a system overview in the service manual (this diagram is derived from it). It is clear that a lot feeds back into the support circuits at the cost of a couple of big connectors. We infer that this printer has fairly sophisticated diagnostic abilities.
50.6 Open fuser, Fuser Heater Cutoff.
Heater error. The fuser heater cutoff has operated (typically at over 240 Centigrade). The heater cutoff is intended to prevent overheating, it's usually a thermostat but could be a temperature dependent fuse. Detecting that this cutout has operated means some sort of sense connection in a mains circuit (inductor, optodetector), some printers can and others won't be able to do that. If there is a detector it is likely to be the low voltage power supply or whichever board has the control relay / triac on it.
Open fuser almost immediately at power up would suggest the LVPSU monitors power consumption and has seen the fault. Check fuser continuity with a multimeter.
This fault will usually appear about 5 to 15 minutes after the printer starts up - the fuser takes some time to go over temperature. Changing the fuser will not actually clear the fault because the problem is that the heater control is not turning off. The fault is most likely to be seating of a connector, the low voltage power supply or possibly the DC controller.

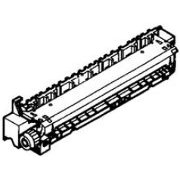
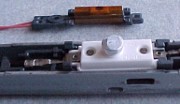
HP LaserJet M602 fuser pressure release cam. The fuser motor reverses and that rotates the cam lifting the lever and releasing the pressure on the heater.
50.7 Fuser Pressure Release Mechanism Failure.
In some models "Fuser motor malfunction". It may be the same thing if reversing the motor is the pressure release mechanism.
On some recent fusers the pressure roller can be adjusted to suit thick media and material like envelopes. When the user selects these media in the printer driver the printer adjusts this setting using a motor - it is usually built into the fuser base. The printer will know that the mechanism is malfunctioning if it cannot adjust the fuser and see the home flag change. There is no very specific reason why the motor and sensor should fail other than that they work in a hot environment. Attempt to rotate the components by hand. Service technicians will know ways to observe the fuser in situ, the mechanism should operate and go to its home position when the printer starts up.
The same 50.7 message is apparently used on some printers where the fuser has its own drive motor. Printers like the P4510 series and M601 series should probably give a "59" Motor Error for the fuser motor.

50.8 Lower Fuser Temperature (sub-thermistor)
The 50.8 and 50.9 errors are generated by fusers that have one or more secondary thermistors. These extra thermistors help assure even heating and work together with multiple heater traces on the ceramic bar inside the fuser sleeve to improve the handling of narrow media.
There seems a good chance that if you are getting the 50.8
error you have the print-driver set for narrow media (envelopes, labels) but have now gone back to printing a report or some heavy print job that needs the full heater turning on.
Download Warning
If you have an HP printer get your firmware and drivers from HP.COM and no-one else! (Or not unless they are the vendor of your operating system).
In our research we come across quite a lot of sites with nice green or blue "download now" buttons claiming to provide free drivers. Wonderful - but why would they provide such an odd public service and "mirror" HP's drivers for them.
People get tired and frustrated with printer problems. Most printer problems are NOT curable with a driver. Fooling people into downloading and installing a "driver" is a way to get them to install malware (virus, trojan, keylogger) in the guise of legitimate software.
If we thought offering drivers was doing people a good turn we would offer them on this site. Be sceptical about anyone offering such things.
50.9 High Fuser Temperature (sub-thermistor)
Likewise here seems a good chance that if you are getting the 50.9
error you have the print-driver set for normal media (A4/letter) but are now printing something narrow like envelopes.
If you get a run of these problems :
- Turn the printer off and remove the fuser. Examine the rollers for contamination. Assuming all seems OK replace the fuser and hope the exercise cleaned any tarnish off the sub-thermistor connectors.
- Measure the resistance between the relevant fuser connectors (see the service manual). However you may need to be a bit sceptical about what it says, for instance several say : …
2. Break in the sub thermistor. Turn the printer off and remove the fuser. Measure the resistance between the fuser connectors J5013LA-4 (SUBTH) and J5013LA-3 (+3.3V). If it reads 600 ohms or below (at ambient temperature), replace the fuser.
… or suchlike. If there is a break then the meter will read "infinity" (not 600 or less). - Depending on the exact printer build the engine controller and PSU board are also suspects in this kind of fault - as is firmware and possibly drivers.
It seems conceivable that 50.8 and 50.9 could be caused by firmware guestimates that proved wrong; it would certainly be a good idea to check you have the latest drivers before going to the expense of buying a new fuser.
More speculatively, it is conceivable that one computer on the network may have wrong media settings or a defective driver and knock the printer into giving one of these errors. They get their print job but leave the printer in an error state. Every step forward in IT seems to create a problem somewhere else.
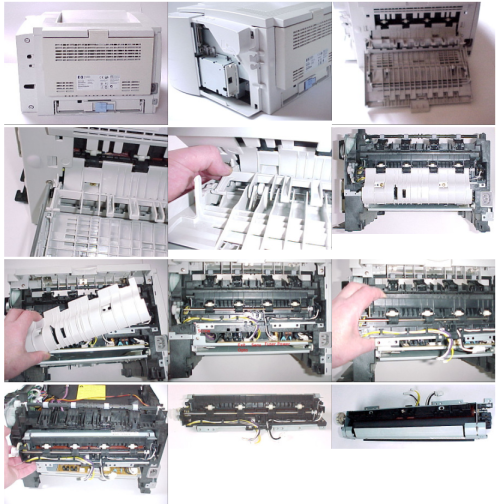
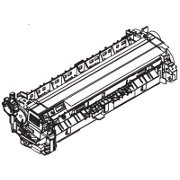
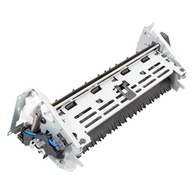
Changing the fuser on a LaserJet 2200; a fairly typical older mid-range office printer. Get the side cover, rear door and rear cover off; disconnect the power and sensor leads; then pull the fuser out.
Slot a new fuser into the hole and then reverse the process.
There is much more in the service manual of course.
Diagnosing Fuser Faults
Some messages give little doubt that the fuser has failed. If the printer has done in excess of 100,000 pages of print and has a broken heater circuit, or if toner is not adhering to parts of the page there is little room for doubt that the failure is the fuser.
Some codes like 50.2 and 50.4 might be the fuser but just might be something else - old firmware or a bad power circuit. In this case a bit of technical work is needed to find out what is wrong.
On older printer designs it is often possible to observe the fuser working, a warm glow can be seen through air ducts in the rear every minute or so. On recent printers this indication of life isn't visible. However a fuser will generally retain some heat for a few minutes. If you take a fuser out of the machine when it should have tried to print and it's stone cold that suggests either the heater is broken (check continuity) or the circuit that drives it has failed.
Diagnosing a fuser fault generally means getting the suspect item out of the printer.
Difficulty in changing a fuser varies greatly by printer model. Printers like the HP LJ-4200 just require the rear door to be removed and two blue knobs release the fuser. The CLJ-2600N is rather more difficult, covers have to be removed and wires handled. More expensive printers tend to have nice modular fusers that are easy to replace. Less expensive models have fusers that aren't easy to change.Why do printer manufacturers make the big printers easy to fix whilst smaller printers are not?The big printer will be fixed, and given the size of the thing that will have to be done on site. Warranty service will have to be done on site as well.If we wanted to be rude about the manufacturer we might say their budget doesn't run to a couple of self-aligning connectors.
People make up their own minds as to whether they are competent to change a fuser. The fuser does involve mains voltage but so does changing a light-bulb. Always turn the printer off and unplug it before working on the fuser. Fusers might have exposed metal parts that carry high voltages with the power on. Be wary about touching any of a fuser's inner parts immediately after it should have worked. The inside of a fuser gets scalding hot in operation (see the warning above).
Taking the fuser out of the machine is also a way to judge how easy it will be to fit a new one. If the fuser isn't examined the printer is going for recycling anyway, it may as well be in bits!
However don't demolish your printer and then decide to call a service technician - they may be amused but uncooperative.
Visual Tests
As a first step check the seating of any wires and connectors. If a connector is not mating properly the printer electronics will report spurious errors. Look for damaged or bent pins on connectors.
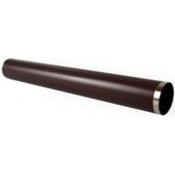
Next look at the fuser mechanism itself. The actual film-sleeve or roller is visible through the paper entry and exit slits - exactly how much can be seen varies by model. Turning the drive gear in the normal direction of paper travel it should be possible to see the pressure roller which will normally be reddish brown or black and the sleeve or roller which will often be grey on mono printers or brown on colour machines. They should be fairly clean over most of their width. The sleeve may have a dark band at one end mating with a little carbon fibre brush - that is an electrical path, not wear.
Sleeves and rollers often degenerate completely at the end of their life. It is possible to replace them and there is more on that below, however the normal course is to replace the whole fuser.
If the fuser looks OK is it still warm? If the printer has been in use the printer will have some warmth in it twenty minutes after use. If the fuser is stone cold when the printer has been on that implies heater failure. Be careful, the inner parts of the mechanism can be very hot.
Audible Problems
Laser printers aren't noted for exceptional noise but there is is often no mistaking when they are working.
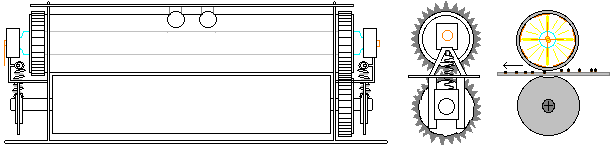
Some fuser models are known for making groaning and clicking noises. A pair of rollers might not seem naturally noisy but the fuser rollers operate under pressure so it does take some energy to turn. The most common source of trouble is on low and mid range printers where opening the lid releases the fuser pressure and removes one of the drive gears in the chain. This makes it easier to remove paper jams. However it is sometimes possible to close the lid sufficiently to make its safety switch but not quite enough to fully engage the gears which then ride unevenly on their counterparts. This gives a noisy whining or clicking gear chain. A diagnostic here is that gentle pressure on the lid will usually change the tone of the noise. There may be visible steppings on one of the cogs. There is no permanent cure except to replace the offending cogs.

Electronics
Pictured is the power and fuser section of the RG1-4193 circuit board from a LaserJet 4200 demonstrating some of the problems of dealing with the electronics.
Getting this board out of the printer is not easy, very little of the machine is left intact.
Another problem is that there is no information available at component level - no circuit diagram has been made available by HP and Google found nothing relevant in a search for "RG1-4193" "circuit diagram"
in September 2014. It's a 12 year old printer so presumably no-one is ever going to reverse engineer the board and make one (or they aren't sharing).
If you know about electronics the board can be "read" to an extent. The power inlet is at the top left with the power switch next to it. The power supply for the electronics goes off to the right.
The fuser fuse has a red strip and the power tracks go down past a surge protection varistor to a filter block and noise reduction circuit.
The fuser socket is the black block at the left and the black wire is fuser common whilst blue and white are heater wires. The relays are blue boxes at the bottom and cut power when the electronics is not on or the safety circuit operates.
The triacs controlling the fuser can be seen on the metal heatsink on the right. Under the heatsink are the opto-isolator circuits that control them.
For instance the LaserJet 4200 and 4300 series have a known issue. The fuser was made easy to remove - it's little worse than changing a cartridge. The problem is that the fuser doesn't always mate quite properly with the gear chain, and the drive cog wears out![]() .
.
Another problem occurs if the fuser has been idle for a long time. The pressure roller is constantly loaded against the heated roller by the springs and it gradually loses its circular form. This results in a whump-whump noise as the roller turns. If you turn the fuser by hand the change in resistance with each revolution is noticeable.
Note that fusers should be stored with the roller pressure released but this is easily forgotten. Over a couple of days with pressure released the roller should return to its proper shape.
Audible problems are notoriously difficult to trace because it take very little energy to make an audible noise. There are more hints on tracing them here.
Electrical Tests
To test the heater circuit look for the power connector. There will normally be two, three or four heavy duty terminals two or three carrying heater power. Others will be the fuser ground wire and possibly a sense connector to the thermal cutout. Use a multimeter to measure the resistance through the heater. Depending on the size and speed of the printer it is likely to be in the range 20 to 200 ohms. Open circuit or a very high resistance implies a broken heater. A short circuit or something under 5 ohms rather implies you're measuring the wrong thing.
The actual resistance of fuser heaters might be expected to be characteristic of the design but apparently that isn't always so. For instance the CLJ 2700 service manual says:
If the resistance is not 5 ohms to 1 kohms (100 to 127 V) or 20 ohms to 1 kohm (220 to 240 V ) replace the fuser.
… that is a wide tolerance! If in doubt consult the service manual for your printer. They don't always give figures and if not make an educated guess.
A fuser resistance of 150 Ohms on 220 Volt Mains will draw about 1.5 Amps so the heater is about 330 watts. That seems about right for a fairly slow printer. The LaserJet 6L has a ceramic heater with a resistance of 130 ohms but throughput is just 6 pages per minute
The LaserJet 5100 has two traces of 85 Ohms each. 20 pages per minute with A3 capability- so not unreasonable.
The LaserJet 2200 has a single trace on the ceramic with a resistance around 60 Ohms - 18 pages per minute. The LaserJet 4200 fuser has one trace at 60 Ohms and a secondary heater at 180 Ohms. The LJ-M601 series has one trace at 85 Ohms and another at 144 Ohms, a somewhat lower heat output reflecting lower melting point toner.
A fuser resistance of 20 Ohms across European mains at 220 Volts would draw 11 Amps - 2420 Watts. That's the kind of power we might expect to raise a fuser to full temperature in a few seconds, which is what big, fast modern printers aim to do. A much lower resistance would raise questions - there would be a current limiter to prevent the printer blowing fuses. (US models have half the resistance and twice the current.)
The thermistor(s) may need checking. The connectors for these are usually smaller and there may be half a dozen pins - some for the paper exit sensor and suchlike. Thermistors will typically have a negative thermal coefficient - they have a high resistance when cold. Actual resistances vary but a cold resistance of about 3 mega-ohms and a hot resistance of 50 kilo-ohms, but we also see them with a cold resistance of 400 kilo-ohms - dropping rapidly when warmed with a finger. There is a lot of room for variation on thermistor design. At a workshop bench it is possible to warm the thermistor momentarily with a coolish soldering iron but that might be in the "do not attempt this at home" class of comments.
Fuser parts come from suppliers in China.
There is a litany of complaint from producers in the US and Europe that the parts industry is dominated by "inferior knock-off copies" from China. That is indeed the problem with fuser parts.
There are simply too many prospective suppliers; everyone is Spartacus. It is difficult to tell which have some claim to be genuine. Those who simply list sleeves next to an HP printer name probably aren't genuine because they don't mention the Canon engine name - which they presumably would if they really knew what they were doing.
The materials and processes for making the materials are quite complicated. We don't suppose HP/Canon deliberately opt for the most expensive processes for low cost printers but it seems likely that some of the imitators are just using anything that gets product out of the door.
There seem to be some resellers in the US with a good reputation - the market there is quite large. In Europe with our divided market there seem to be fewer, more expensive suppliers.
How you can tell if Alibaba or ebay vendors are selling good products? We doubt you can.
There is a chicken & egg problem. Lack of interest in repair has created parts that aren't as readily available as they might be because no-one buys the parts.
Manufacturer attitudes on making fuser spares available vary. HP and Canon parts for fusers don't seem to be readily available. Brother do make the parts available - which is a point in their favour.
Repairing Fusers
Fusers are not inherently complicated; a couple of rollers with a heater and thermistor.
Repairing a fuser with a new heater and hot roller, perhaps together with a lamp and new bushings was often possible in the past. Whilst the parts weren't commonplace the lamp was the sort of thing that was fairly commonly made for spotlights and cookers and the process for making the Teflon coated rollers wasn't entirely exceptional.
Things move on, whilst ceramic heaters are quite commonplace they are all different and seemingly proprietary designs.
Repairing a fuser in a local workshop or doing it as a DIY job in an IT department has been less common in recent years. It is quite a labour intensive job, it gets easier if there are a stream of items. At one time there was a small family of largely Canon based products to work on but there are now more print-engine types out there. In any repair centre there isn't usually a stream of identical items. Instead there are ones and twos: it is the same problem as cartridge refilling but fusers last 20 times as long as cartridges so at best there might be a twentieth the volume of trade.
Component production capacity is in Asia.
Printer brands themselves rarely sell components for fusers; HP and Canon do not. They would argue that it is uneconomic to supply small and infrequently requested parts - and of course they don't really want refurbished parts detracting from sales of their own spares or new printers. There is no information available from the manufacturers on the specification of parts or who might supply them. This kind of part doesn't have a label.
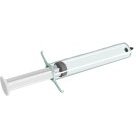
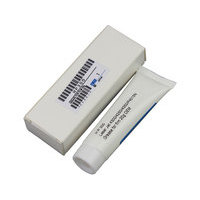
To rebuild a fuser the least you need is the correct sleeve and some lubricant. The sleeve is fairly complicated, a PAI or metal base, coated with an anti-adhesive coating of polytetrafluorethylene can be made to adhere with plasma surface treatment. According to the patents there can be anything up to six layers with heat treatment in an autoclave in between
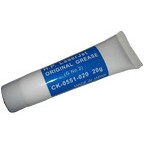
Lubricant is essential to allow the sleeve to move freely over the flat ceramic bar at a temperature up to 240 centigrade which is where the thermal cutout will operate. The material is a PTFE thickened, light viscosity, completely fluorinated grease
. Potentially you can use other high temperature greases, for instance silicone and lithium. One US repairer was using silicone, but found the grease thickened after 6 months causing blurred prints.
Other parts quite likely to be needed include the heaters, pressure rollers, thermistors, thermostat and particularly the bearings or bushings that support the roller. Carbon brushes and an appropriate conductive grease might also be needed.
Sourcing materials is difficult. Few of the prospective suppliers have much by way of a website; they tend to have a rather terse entry in Alibaba. eBay vendors are even less informative, presumably because they bought from Alibaba vendors. Without product traceability the only way to assess quality is to try it and not use that vendor again if it doesn't work. But of course we don't know whether the vendor will change technique, or change their supplier. We suspect some of these components don't have a single supplier - they have a supply chain.
So we have repair jobs that will tend to be one-off, can take someone with some understanding and skills an hour and because of faults in materials or technique the result doesn't always last a long time in the printer.
Refurbished Fusers
Refurbished fusers are units repaired to a professional standard.
We sell refurbished fusers because they are significantly cheaper than manufacturers originals. Furthermore fusers are quite big, complicated items and whilst buyback on the "cores" tends to be £1.50 and not cover the cost of shipment we don't really want all those parts going to waste.
We find they are somewhat less reliable, so our general advice is that if you rely on a single printer and cannot tolerate it being down for any time buy a manufacturers original fuser.
Reasons why refurbished fusers may not be as good as manufacturers originals were given in the previous section. It is not possible to know that all the components are good unless the maker specifies exactly what they are doing - but if they do that they give away their trade secrets and supply lines - so they won't do that. Instead you will get assurances of highest quality before sale.
Incidentally DON'T rely on one printer - they do fail and you won't always be able to get spares the next day. If you want someone to argue with put the thing on a maintenance contract. Reasonably capable mono printers cost less than £200 (and cheap to buy, expensive to run ones that will get you round a problem sell for £70.)
At one time refurbishing fusers was something workshop engineers would do on slack Fridays (Friday afternoon jobs). We think most refurbished fusers are being imported from China (or other BRICs) these days.
The idea that refurbishing can be done professionally deserves a bit of expansion. Refurbishing one fuser is a difficult job; it requires the ability to remember the jigsaw of fuser parts and a certain amount of physical dexterity with small parts. A significant problem is to get a film-sleeve, lubricant and (possibly) heater to the right specification. Manufacturers prefer to sell new fusers so they either do not supply parts, or don't do so economically. Parts used are ‘ compatibles ’. Refurbishing is one of those jobs that might be done in small numbers locally but tends to migrate to big facilities. The result is that refurbishing is done formulaically rather than professionally.
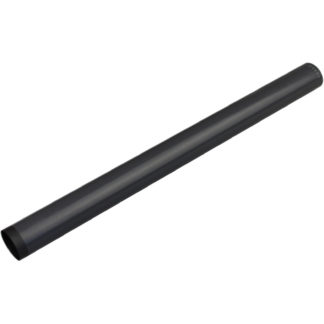
Fuser Films
We used to sell a few fuser films but found it troublesome and stopped. But it is mainly the film that fails and not selling them is an annoyance - this is something that ought to be possible. So we are reintroducing them.
Repairing a fuser by replacing the film requires some knowledge of how fusers work and for the first few devices it needs patience. It won't invariably be successful both because it's difficult to be sure about the quality of the film, the lubricant and your own work.
Copyright G & J Huskinson & MindMachine Associates Ltd 2013, 2015. Some pictures derived from HP User and Service guides. These technical pages do not constitute an offer for sale; just our knowledge at the time of writing. See the catalogue. Sales pages on this Web site use cookies to store user information. We also use Google Analytics to track site usage patterns.