
HP Original Toners

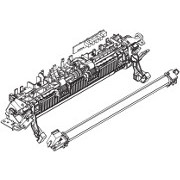
Fuser
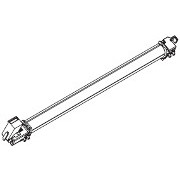
Spares

Paper Jams in the HP LaserJet Professional P1102, M1130 and M1210 Series Printers.
Paper jams are one of the most frequent problems with printers.
The Laserjet M1132, M1212, M1217, P1102 and the Canon LBP6000 printers are all based on the same engine and although they look a bit different the paper path through them is the same.
Clearing paper jams.
Try not to tear paper when clearing a jam as torn fragments can cause persistent problems if they get into a paper detection photo-interrupter. Remove the print cartridge to get access to the page if necessary. Opening the cartridge door may also help removing pages that have emerged halfway into the delivery tray and are gripped by the fuser.

Paper jams innevitably mean there can be lose toner on the page and some may be released into the printer as the page is removed. Any problem should clear as the next couple of pages print. If not run a cleaning cycle .
If toner gets onto hands or clothes remove it by lightly dusting it or using cold water. Never use hot water on toner as that will cause it to set firmly onto fabric.
Explanation of Paper Drive
The paper path in these printers is "C" shaped. Paper loads into a tray at the bottom front. The page is picked up by a roller and pad pair in the back and pushed up and back into the registration station. The registration rollers take over and drive the paper up across the transfer roller where the image is picked up from the drum and then through the fuser and out onto the top of the printer.

Understanding and Avoiding Paper Jams
There are details on how the printer moves paper below. First here are some hints on avoiding problems.
Don't overload the paper tray - the tray is "rated" for 150 sheets of ordinary copy paper which is just over a quarter of a ream pack. Keep the remaining paper in the pack it came in and turn the flap back over it to keep damp out. Store paper flat and in a cool dry place. Thick paper means the tray holds fewer pages, for instance it is only intended for 10 envelopes. If the top sheet is too close to the "D" shaped pickup roller it will start moving too soon, or prevent the roller moving properly.
Adjust the paper guides to fit the page, they should touch the sides of the paper stack to keep it neat but not grip the sheets. If the paper guides are too tight they will prevent paper moving. If they are too lose paper will be able to shift to one side and either print will sometimes come out skewed or paper will collide with the innards of the printer and jam.
Make sure the paper tray is properly in its printing position. On some of these printers it folds up when not in use.
Changing paper size and type (Windows) ![]()
- On the File menu in a program click Print
- Select the Printer, then click Properties or Preferences
- Select the Paper/Quality tab
- Select from the Paper Size drop-down list
- Click the OK button
Check the paper size matches that set by the printing application - the program you are using and the printer driver. the application will overrule the driver and the driver will overrule anything set by the hardware. These printers have no ability to detect an incorrect paper width or length before they start to print. If you specify A4
but load legal paper
the printer will detect that the page is still exiting when it should have ended and will probably signal a paper jam.
Custom paper lengths can range from 127mm (5 inches) to 356mm (14 inches). Widths can be from 76mm (3 inches) to 216mm (8.5 inches). Postcard to US legal
size. Paper weights are from 60gsm through to 17gsm. Set the correct size in the application if it has a paper setting, in the driver if not.
Don't let dust build up on the paper or the tray, the pickup roller will tend to slip more often. Dust will also get into the mechanism and degrade the print quality. (Some models of this printer have a dust cover, some don't; its one of those cost-saving measures that delivers so much functionality at the prices these things sell for.)
Straighten the paper stack when adding more paper. Take any remaining paper out of the tray and straighten it with the new sheets to make a neat stack.
Use sizes and types of paper recommended by HP (or Canon as appropriate) and set out in the User's guide (Section 6, around p 54 in the pdf) and summarised above.
Paper that is in bad condition, stored in damp conditions or stacked on a warehouse floor will cause misfeeds and that will damage the feed roller and pad. Sometimes bad paper can only be used for handwritten notes.

Solving Paper Handling Problems
Invariable Paper Jams indicate that a setting is wrong - or that something is jammed in the paper path, or that paper pickup roller or pad are damaged beyond use. There are instructions on how to examine and change them here.
It is unlikely that something can jam in the paper path of these printers beyond remedy, as with the door open and the cartridge out you can see down into the paper tray - there is nowhere for a fugitive label or torn piece of paper to hide.
If the jam happens when the paper has progressed beyond the cartridge and the top part has toner on it then the fault is the fuser. If the fuser foil has degenerated then the paper will probably be folded into a rather untidy concertina. See the instructions for changing the fuser here.
Frequent Paper Jams Indicate either a problem with the paper or with Store paper flat in its moisture-proof wrapping. Try taking the paper out, re-stacking it and turning it over. Paper sometimes has invisible biases in the way it is cut or the distribution of moisture that cause it to curl and prevent easy feeding.
Avoid paper that has any sort of cutout or perforations. These printers aren't capable of handling them (only a few laser printers suit this sort of thing.
Avoid paper that has ragged edges such as handmade sheets - a printer with a straight through path will be more appropriate than one with a C shaped path.
Labels are explicitly allowed by HP. They do say to use a type that has no exposed backing and only use full sheets. All the printer manufacturers hate the user habit of peeling one label off and then putting the sheet back through. In some ways these printers are well suited to label printing because there is no place for a label to hide (except inside the cartridge). Only use laser-printer labels - other kinds will come off in the fuser causing expensive damage. (The printer might be a write-off)
The paper-length adjustment in the input tray is set at a length that is greater than the paper size so that paper is not held against the pickup roller. Set the paper-length adjustment end-stop to the correct length.
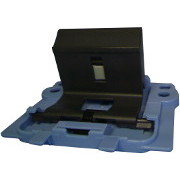
Paper doesn't pick up - the printer stops and paper has not moved to the registration point. The M1212 will say "No paper pickup Press [OK]" or "Paper jam clear paper path". The pickup roller may need cleaning or replacing. Instructions are here .
Manual feed mode can be set at the computer, follow the on-screen instructions to deactivate manual-feed mode. Or open and close the print-cartridge door.
More than one sheet feeds at one time. There are three likely causes and cures. The paper tray is overloaded, reduce the number of sheets. Successive sheets of paper are sticking due to damp or cutting method, try turning the stack over. Finally the separation pad might be worn and need replacing. Instructions are here .
Excessive curl can cause paper jams, particularly as paper is exiting from the top of the printer. Heat from the fuser dries one side of the paper more than the other, causing curl in paper that is is too moist, has the wrong grain direction, or is of short-grain construction. Try a different pack of paper.
Print quality varies from side-to-side. Try turning the paper over. Use a long grain paper. There are some paper types which are only intended to be printed on one side.
Print is skewed (crooked) The paper guides might be incorrectly adjusted.
Remove all paper from the input tray, straighten the stack, and then re-load the paper in the input tray. Adjust the paper guides to the width and length of the paper that you are using and try printing again.
Details on Paper Feed
People like the convenience of cut-sheet paper but forget that reliable propulsion of a sheet through the machine is actually quite difficult. Paper pickup is achieved by using a soft rubber pickup roller with a texture to engage with the paper. Something we might call "stiction" drives the paper into the printer.

To prevent two pages feeding at once these printers use a separation pad. The pad presents a rubber surface under the pickup roller which is rather harder, paper hits as it feeds. If one sheet hits the pad stiction from the roller is sufficient to keep it moving. If two or more sheets are stuck together only the top sheet has enough force to keep moving. The next sheet down will receive that force in turn when the first has moved.

Slight differences in paper movement depending on whether or not paper is on the separation pad would cause the print position to drift, but this is corrected by the registration rollers, they only start turning a moment after paper arrives. If there is drift in the print position it is caused by the page-length setting in the computer or by the registration rollers, not the pickup roller.

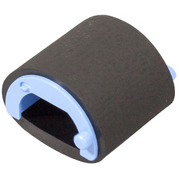
The diagrams above- right are "generic" and apply to many printers. In the HP LaserJet Professional M1130 / M1210 series and similar machines the roller is actually D shaped. The advantage of a D shaped roller is that the flat side is clearly disengaged from the paper when the roller ceases turning as the registration rollers take over and pull the paper through the printer.

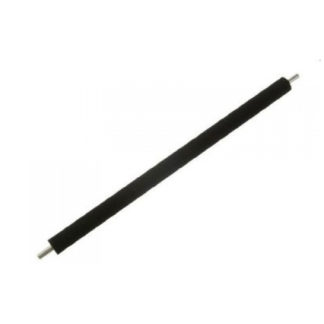
The feed roller is visible in the bottom centre of the printer when the cartridge is removed (as shown in a picture above). It should have an irregular somewhat flesh like ridged texture to it. The texture wears away as the roller is used and then misfeeds start to become common. Sometimes cleaning the roller with water will help but often it just needs replacing.
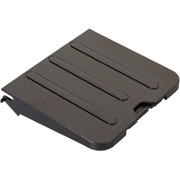
It is normal to change the separation pad at the same time as the roller. A worn out pad is far less evident - there is often nothing to see. A sign that the pad is worn is that there are often two sheets involved in a paper jam. The pad is inserted through the base of the printer and held in place by two screws.
Instructions on changing the pad are here .


Copyright G & J Huskinson & MindMachine Associates Ltd 2013, 2015, 2016. Some pictures derived from HP User and Service guides. These technical pages do not constitute an offer for sale; just our knowledge at the time of writing. See the catalog. Sales pages on this Web site use cookies to store user information. We also use Google Analytics to track site usage patterns.